Getting a motorcycle ready for a day jaunt or a multi-day road trip isn’t just about topping up the tank and slapping on a grin — it’s about making smart choices with the right accessories, a few checks that save you from roadside headaches, and packing like you actually want to arrive with everything intact. Whether you ride a sportbike, a cruiser, or an ADV, a little preparation goes a long way toward safety, comfort, and enjoyment. In this guide I’ll walk you through the simple pre-ride checklist, smart luggage strategies, and the on-the-road maintenance habits that keep the miles fun and the surprises to a minimum.
Pre-ride Checklist: Safety, Comfort, and Reliability
Start with the basics but don’t skip the details. Check tire pressure and quick inspect tread for embedded objects; run your fingers over the tire to feel for cuts or bulges. Verify brake function — lever and pedal feel, no sponginess — and visually inspect brake pads for wear. Test all lights (head, tail, brake, turn signals) and the horn; visibility and being seen are the most reliable trip-savers.
Comfort matters because discomfort becomes distraction. Assess seat and riding position: if you plan longer days, consider a gel insert or aftermarket seat; check handlebars, grips, and footpeg position for ergonomic fit. Inspect windscreen and airflow—small adjustments or a taller shield can reduce fatigue. Technical note: small changes in ergonomics can cut rider fatigue by improving posture and reducing vibration transfer to hands and control points.
Reliability is the practical side of confidence. Check fluid levels (engine oil, coolant, brake), chain slack and lubrication, battery voltage (a healthy battery reads ~12.6V at rest), and torque on visible fasteners where appropriate. Don’t forget mounting points for luggage and accessories—confirm quick-release fittings and straps are secure and that any added load falls within the manufacturer’s rear luggage capacity and suspension load limits. Common mistake: assuming factory fasteners are tightened to spec after rough roads—re-torque where needed before you ride.
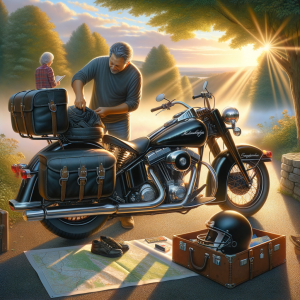
Packing Smart: Luggage, Load Balance, and Gear Tips
Choose luggage that fits your bike and your trip. Tank bags and a small tail bag work great for day trips because they keep essentials accessible; for road trips, hard top-cases or lockable saddlebags offer security and weather resistance. Consider materials and mounting: Cordura and Hypalon offer abrasion and water resistance; aluminum or ABS hard cases resist theft and compressive forces. Look for vibration-resistant mounts—rubber-damped mounts or anti-vibration quick-release plates keep contents from shaking loose.
Think like a load planner: heavy items go low and centered, next to or over the bike’s center of gravity, and as close to the chassis as possible. Put tools and spares near the tail or under the seat; clothes and lighter items can go higher in a tank bag or top case. Use dry bags or liners inside soft luggage and compression straps to keep the load compact—loose gear moves and affects handling. Practical packing tip: keep rain layers and a small first-aid kit in an accessible compartment or tank bag for quick stops.
Avoid common luggage errors: overloading beyond the bike’s rated payload, strapping gear over exhausts, and using inadequate tie-downs. Invest in quality mounting hardware and ratchet straps or cam straps rated for motorcycle use (look for UV-resistant webbing and a breaking strength rating). Consider modular systems that allow you to remove or reconfigure luggage for city runs versus touring, and remember security—use lockable mounts or a small cable lock for overnight stops.
On-the-Road Maintenance: Tires, Tools, and Quick Fixes
Tire health is the single most important in-ride maintenance concern. Carry a compact pressure gauge and check PSI when the tires are cold or give them a minute to settle after a few minutes’ ride; adjust according to your bike’s load chart and the luggage you’re carrying. Know the minimum tread depth for your jurisdiction and inspect for punctures regularly—sitting at a cafe, give them a glance and a quick squeeze test for abnormal flex.
Your tool kit should be compact but purposeful: multi-tool, adjustable wrench, selection of metric Allen keys and sockets matching your bike, tire repair kit or tubeless plugs, compact pump or CO2 inflator, spare fuses, zip ties, and a few meters of duct tape. Add chain lube in a small plastic bottle and a micro towel; a quick lube after a wet stretch can prevent accelerated wear. Pro tip: waterproof pouches and labeling keep small bits organized and quick to find.
Learn a few quick fixes and when they’re enough: using a tire plug kit to get you to the next town, re-routing a snapped indicator wire temporarily with electrical tape and zip ties, or re-torquing a loose mounting bolt that’s become audible on rough roads. But also know when to stop — if a lubrication failure, overheating, or unusual vibration persists, ride slowly to the nearest safe place and call for assistance. Common mistake: improvising with gear that isn’t rated for the stresses (e.g., tying heavy luggage with light bungee cords); use appropriate straps and check them frequently.
A bit of prep and the right accessories transform a good ride into a great one. Follow the checklist, pack with balance and purpose, and carry a compact, sensible toolkit — you’ll cut down the surprises and spend more time enjoying the scenery. Final practical tip: after your first short trip with any new luggage or setup, do a home test ride and a checklist run-through—you’ll find mounting or balance quirks before they become a roadside story. Ride safe, pack smart, and don’t forget to stop for the coffee and the view.